If you’re looking for ways to optimize user experience and enhance interaction on your website, the Header Bar in Zotabox is an essential tool. In this guide, we will help you understand how to set up and customize the Header Bar to effectively promote your campaigns and boost customer engagement.
Why is the Header Bar Important?
The Header Bar is a notification bar that appears at the top of your website. It helps you convey important messages to your customers quickly and effectively. Whether it’s announcing promotions, discounts, special events, or any crucial information, the Header Bar ensures your message is seen. With this tool, you can:
Enhance Interaction: Encourage customers to sign up for emails, use discount codes, or share on social media.
Optimize User Experience: Provide information quickly and easily accessible.
Step-by-Step Guide to Using the Header Bar in Zotabox
1. Edit the Main Content of the Header Bar
You can edit the main content of the Header Bar to convey your message to customers. For example, you might write “Big flash sales on July, 7th.” Ensure your message is clear and compelling to attract attention. Additionally, customize the button text and link it to your promotion page. This makes it easy for customers to navigate to your sales event, enhancing their shopping experience and increasing conversion rates.
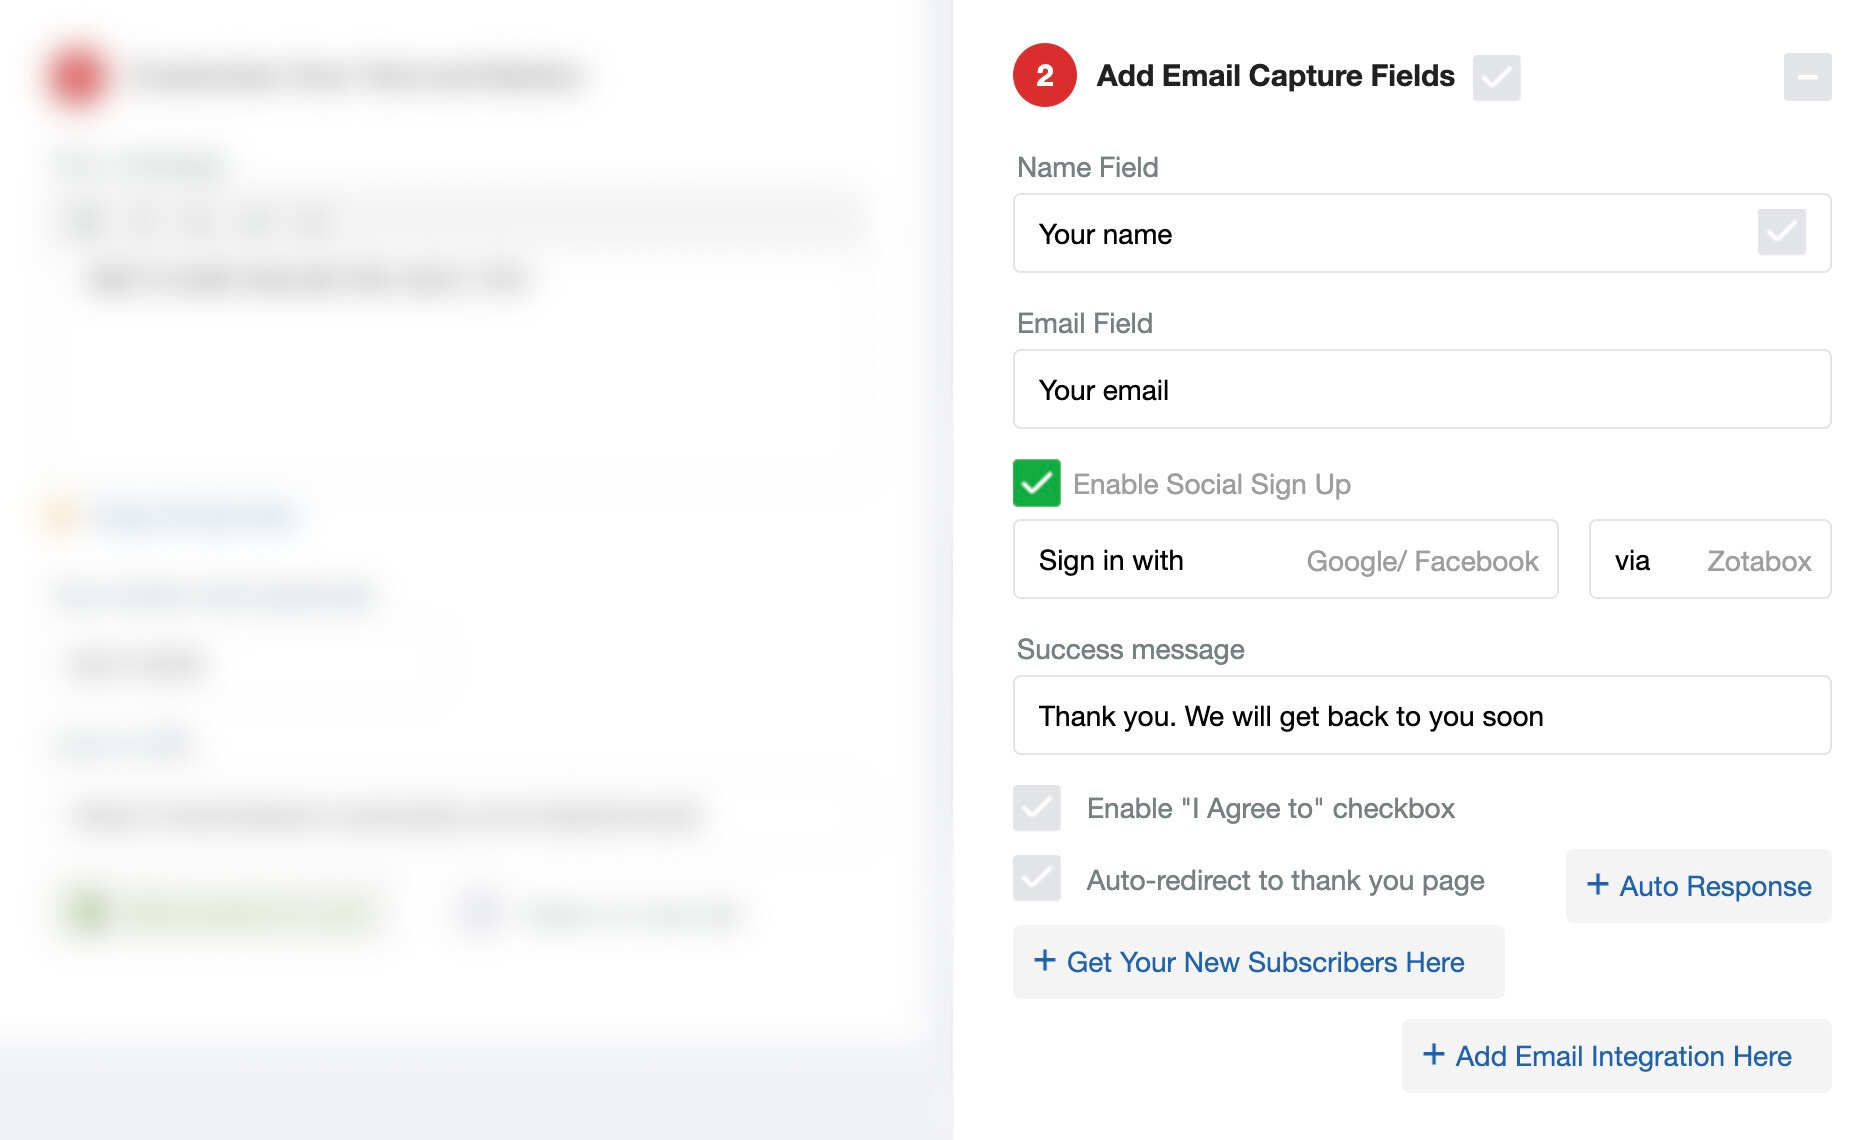
2. Add Email Capture Fields
The Email Capture Fields feature allows you to collect valuable customer information easily. Here’s how you can set it up:
Add Name and Email Fields: Include fields for customers to enter their name and email address, making sign-up simple and efficient.
Enable Social Sign-Up: Allow customers to sign up using their Google or Facebook accounts for a seamless experience.
Set Up a Success Message: Display a thank-you message to customers after they sign up, acknowledging their participation.
Enable the ‘I Agree’ Checkbox: Ensure compliance by adding a checkbox for customers to agree to your terms.
Auto-Redirect to a Thank-You Page: Automatically redirect customers to a thank-you page after they sign up, enhancing their experience.
Add Auto-Response and Email Integration: Manage your customer list effectively with auto-response emails and integration with your email marketing tools.
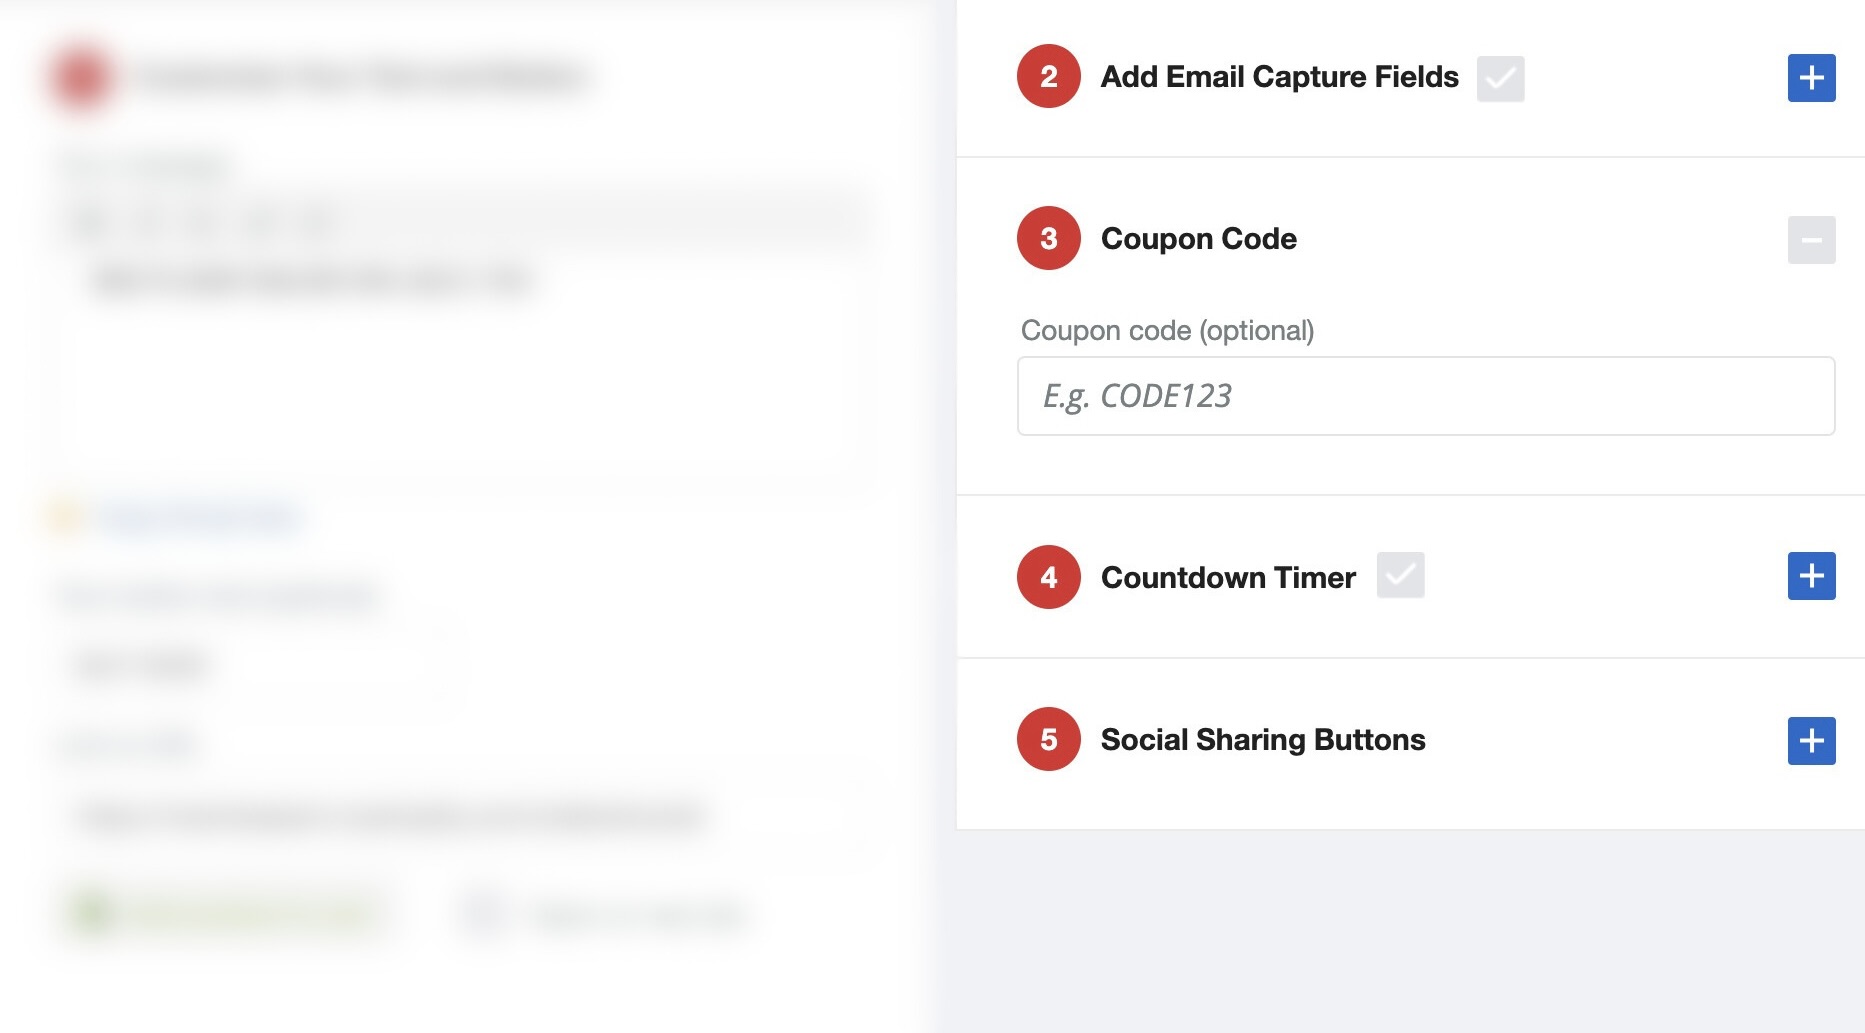
3.Add Coupon Code
Incentivize purchases by adding a Coupon Code to your Header Bar. Here’s how you can set it up:
Enter the Coupon Code: Provide the coupon code that customers can use at checkout to receive discounts.
Provide a Description: Add a description or conditions for using the coupon to inform customers about the offer.
Set an Expiration Date: Create a sense of urgency by setting an expiration date for the coupon.
Customize Appearance: Adjust the appearance of the coupon code to match your Header Bar design, ensuring consistency with your brand.
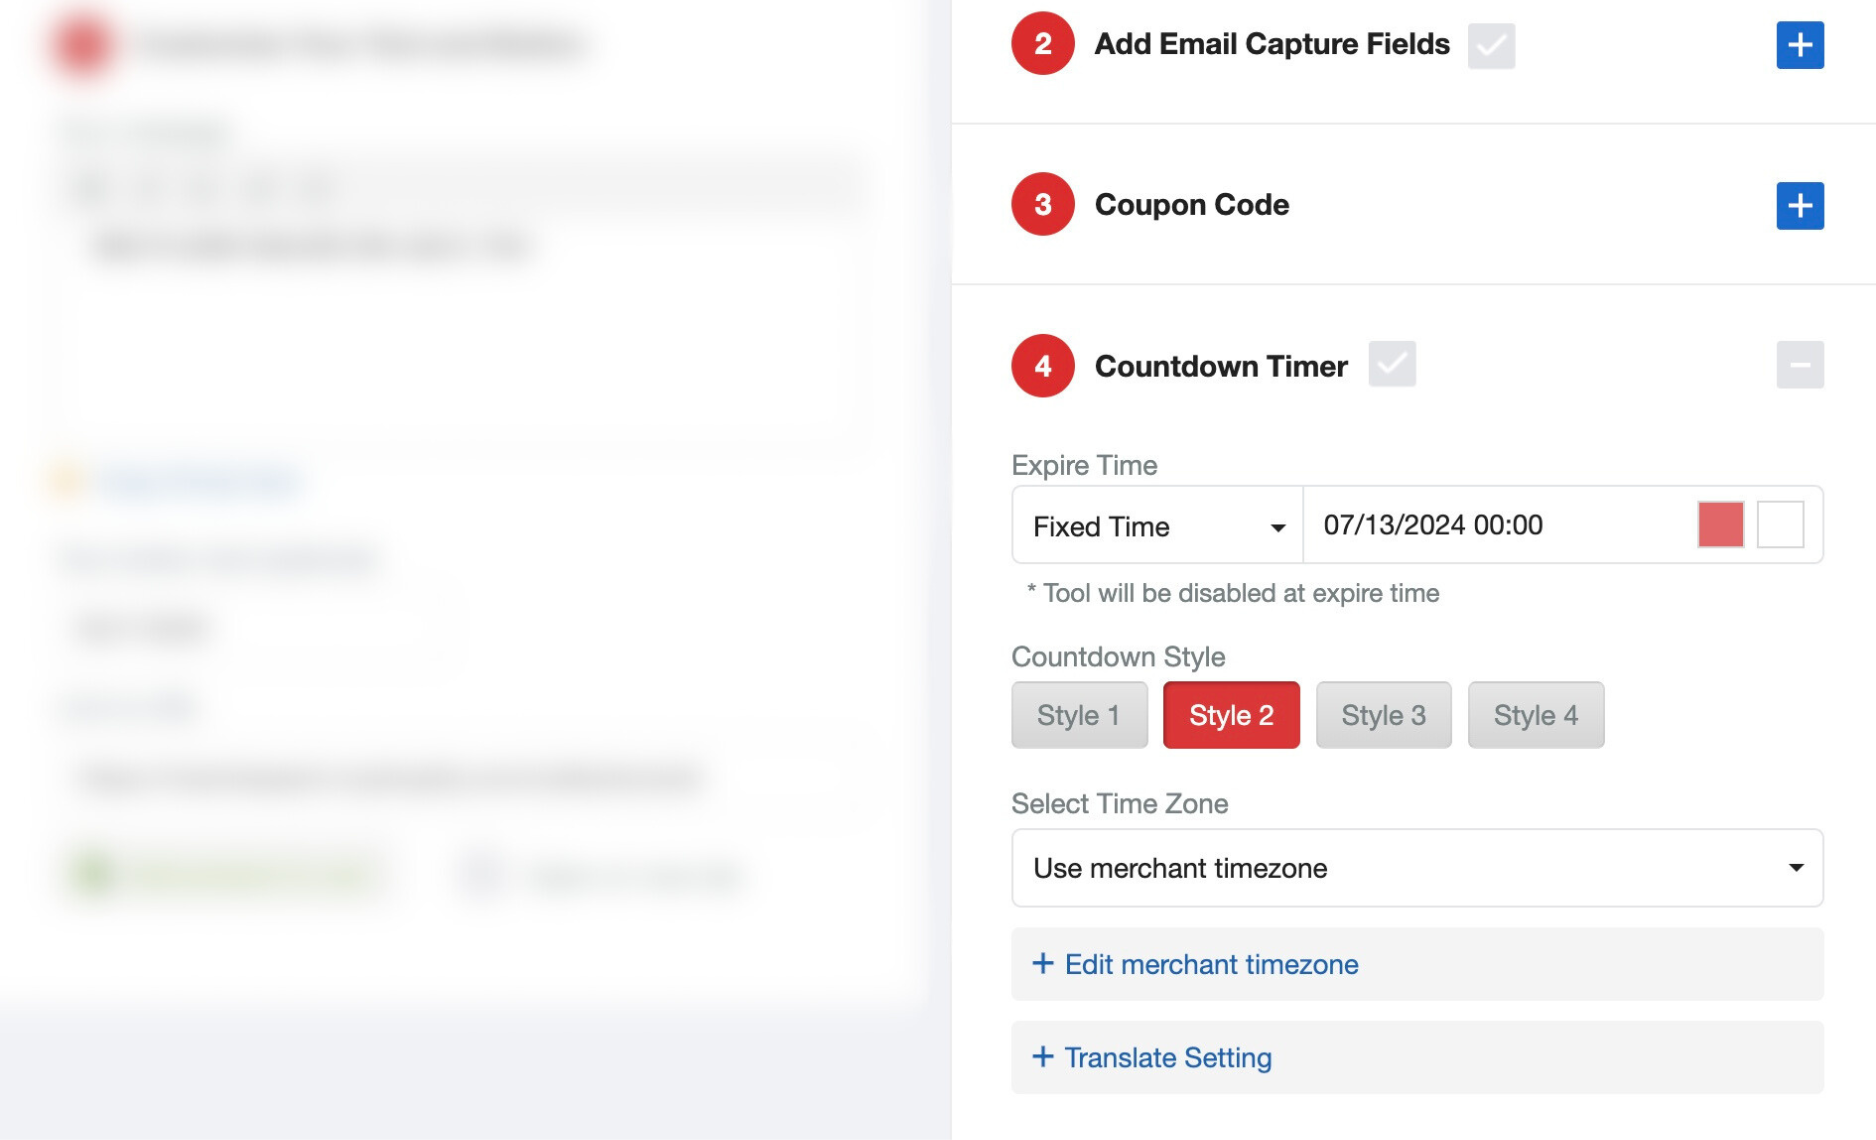
4. Add Countdown Timer
Creating urgency is a great way to boost sales, and the Countdown Timer feature helps you achieve this. Here’s how you can set it up:
Set the Expiration Time: Define the end time for your promotion to create a countdown.
Choose a Countdown Style: Select a countdown style that matches your website’s design for a cohesive look.
Select the Time Zone: Ensure the timer displays accurately by choosing the appropriate time zone.
Adjust Merchant Time Zone and Translation Settings: Customize the time zone and language settings to suit your audience, making the timer more effective.
5.Add Social Sharing Buttons
Encourage customers to share your promotions on social media with Social Sharing Buttons. Here’s how you can set them up:
Choose Social Media Platforms: Select which social media platforms to include, such as Facebook, Twitter, and Pinterest.
Customize Button Appearance: Match the appearance of the buttons to your Header Bar to maintain a consistent design.
Enable or Disable Buttons: Easily enable or disable the buttons as needed, providing flexibility for your campaigns.
5. Save and Activate the Header Bar
Finally, save your changes and activate the Header Bar so it can appear on your website. This ensures your settings are applied and the Header Bar is live for your visitors to see.
Our team features developers with over 20 years of tech and e-commerce app experience, alongside marketers with 10+ years of expertise. We provide top insights to help you optimize conversions and increase revenue on e-commerce platforms.